
October 21, 2026 · Quartz Epoxy Pro
Can you epoxy your own garage floor?
Yes, you can epoxy your own garage floor. Most homeowners finish in a weekend: prep and prime on day one, pour on day two. The coating is the easy part. The prep, the weather and the defoaming roller decide whether it looks like a pro did it.
What the job really involves
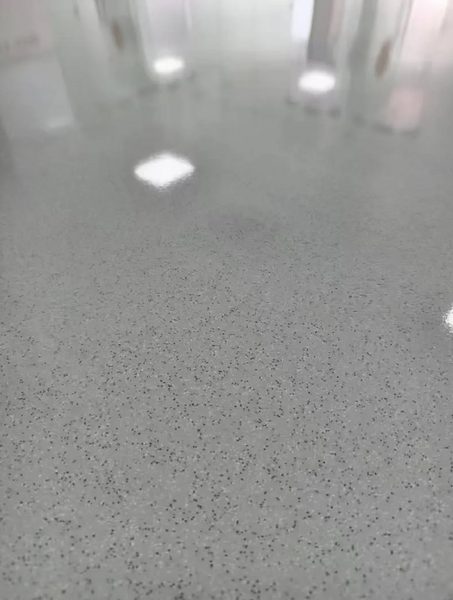
A quartz epoxy floor is a two part bisphenol A epoxy mixed with quartz sand aggregate, poured and spread across bare, clean concrete. You are not rolling on paint. You are mixing a batch, pouring it, spreading it to an even thickness with a squeegee, broadcasting the quartz, and popping the air bubbles before the batch starts to set.
The work has three parts:
- Prep. Clean, degrease, fill cracks and grind the whole slab. This is the longest part.
- Prime. Optional on some floors, strongly recommended on others. More on that below.
- Pour and defoam. Mix one kit at a time, pour it, spread it, roll it. Repeat until the floor is covered.
Our indoor quartz sand epoxy self leveling garage floor kit covers 100 sq ft per kit. A 2 car garage of about 400 sq ft takes 4 kits. If you are not sure of your count, read how many epoxy kits do I need for my garage before you order.
The weekend timeline
Day one: prep and prime
- Clear the garage completely. Sweep and vacuum.
- Scrub with a concrete cleaner or degreaser, paying extra attention to oil spots. Rinse and let the slab dry fully.
- Do the water droplet test. Sprinkle water on the floor. If it soaks in within about 30 seconds, the surface can take coating. If it beads up, there is a sealer or contaminant you still need to remove.
- Fill cracks, pits and holes with concrete patch compound or epoxy crack filler and let it cure fully. Never use silicone fillers.
- Grind the entire floor with an angle grinder and diamond cup wheel, or a rented floor grinder, to a texture like 60 grit sandpaper.
- Vacuum every bit of dust. Leftover dust acts as a barrier layer between the concrete and the coating.
- Prime if your floor needs it. Apply thin with a 9 inch roller or squeegee in 10 x 10 ft sections, no puddles, and let it cure per the label (4 to 24 hours) until it is tack free.
Prep alone takes about 2 to 6 hours or more. A 500 sq ft garage with staining can take a full day.
Day two: pour
- Set out every tool before you open a single container. Pot life is 20 to 30 minutes from the moment mixing begins.
- If you are adding epoxy color paste, it goes into Part A before you combine it with Part B.
- Mix one kit at a time with a drill and mixing paddle for 3 to 5 minutes, scraping the sides and bottom. Follow the mix ratio on the kit label. Do not mix by hand; it causes soft spots.
- Start in the far corner and work toward the door. Spread with the squeegee in 100 to 150 sq ft sections, overlapping 4 to 6 inches and keeping a wet edge.
- Distribute the quartz aggregate evenly right after pouring.
- Defoam immediately with the spiked roller.
After the pour
Light foot traffic at 24 hours. Full cure at 72 hours. Heavy traffic and driving at about 5 days. Water exposure at 7 days. Keep the space ventilated through application and the 72 hour cure, and do not aim heaters or fans directly at the surface.
Tools list
- 22 inch squeegee with pole ($29.99) for spreading
- 20 inch defoaming roller ($39.99) for popping bubbles
- Extension pole ($24.99) for the roller
- Epoxy tool kit ($125) with a tool bag, spiked shoes and five application and finishing trowels, if you want the full setup
- Drill and mixing paddle
- Angle grinder with diamond cup wheel, or a rented floor grinder
- Shop vacuum, broom, scrub brush and degreaser
- Crack filler (concrete patch compound or epoxy crack filler)
- Primer and a 9 inch roller, if your floor needs priming
- PPE: nitrile gloves, eye protection and a respirator
The 4 things that decide success
1. Prep
Our installation guide traces about 95% of epoxy failures back to inadequate surface prep. Oil, grease, old sealer and grinding dust are the usual culprits, and the result is peeling. Grind the whole floor and vacuum thoroughly. For a deeper look at prep options, see grinding vs acid etching your garage floor.
Use primer if your concrete is porous or older than ten years, was previously painted or sealed, has a history of moisture, or will see heavy vehicle traffic.
2. Temperature and humidity
Apply only between 41°F and 90°F. The ideal cure range is 68°F to 77°F. Below 55°F, cure time can double or more. Above 75°F, pot life gets shorter, and above 85°F you should work in smaller batches. Relative humidity must be below 65%, and you should moisture test the concrete before you start. In Arizona summers, that usually means starting early in the morning.
3. Full coverage
1 kit covers 100 sq ft at a target thickness of about one eighth inch. Do not stretch it. A thin coat will not level properly and tends to look streaky. Measure length x width, divide by 100 and round up.
4. Defoaming
Concrete releases air as the coating goes on. If those bubbles are not popped while the epoxy is wet, they cure into pinholes and craters. Go over each area right away with the spiked roller, 2 to 3 slow passes with 50% overlap. Hot conditions add bubbles, so work when it is cooler. If you already have bubbles, read how to fix bubbles in an epoxy floor.
When to call a pro
Think about hiring an installer if:
- Your slab has ongoing moisture problems you cannot get under control.
- The slab is actively moving or settling. An epoxy coating does not stop a slab from moving or prevent new cracks from soil movement.
- You cannot set aside a full weekend plus the cure time, or you are not comfortable running a grinder.
- The job is a large commercial space.
National pro install pricing is often quoted around $4 to $10 per square foot (HomeServe, citing HomeGuide). On a 400 sq ft garage that is roughly $1,600 to $4,000. Four indoor kits run $996 in the grey colors or $1,200 in Black, plus about $95 for a squeegee, roller and pole if you do not own them, plus primer if needed. The full breakdown is in what it costs to epoxy a two car garage, DIY vs pro.
One more note: the indoor kit is for garages, shops, basements and interior concrete. It is not for patios, driveways, pool decks or direct sun. Outdoor jobs use the outdoor washed stone kit.
Read the full installation instructions before you start, and check our city planning guides for local tips. Phoenix area customers can pick up at our Queen Creek shop with no freight charge, and we ship nationwide.
Quick answers
Can a beginner epoxy a garage floor?
Yes. If you can follow a checklist, run a grinder and work steadily for about 20 to 30 minutes per batch, you can do it. The kit is built for homeowners, and every kit comes with free phone support.
How long does it take to epoxy a garage floor yourself?
Plan on a weekend. Prep and prime on day one, pour on day two. After that, light foot traffic at 24 hours, full cure at 72 hours, and driving on it at about 5 days.
What is the most common reason a garage floor epoxy job fails?
Surface prep. Our installation guide traces about 95% of epoxy failures back to inadequate prep, such as oil, old sealer or dust left on the concrete.
Is primer included in the kit?
No. Primer is sold separately. It is strongly recommended for older or porous concrete, floors that were painted or sealed, and areas with past moisture issues.
You can do this. We will help.
Every kit comes with free phone support, Monday to Friday, 8am to 5pm Arizona time. Call before you start and we will walk you through your floor.